Print Ready Set-up Instructions
Canva
1. Go to File > Settings and select "Show Print Bleed". A dashed line will appear around your design workspace.
2. Click "Share" > "Download". Select "PDF Print" as the file type to ensure 300dpi output.
3. Check "Include crop marks and bleed". If using Canva Pro, select "CMYK" as the color profile.
Adobe InDesign
For new files:
1.1. Click “New File”, choose a document size, or type the size in Width and Height
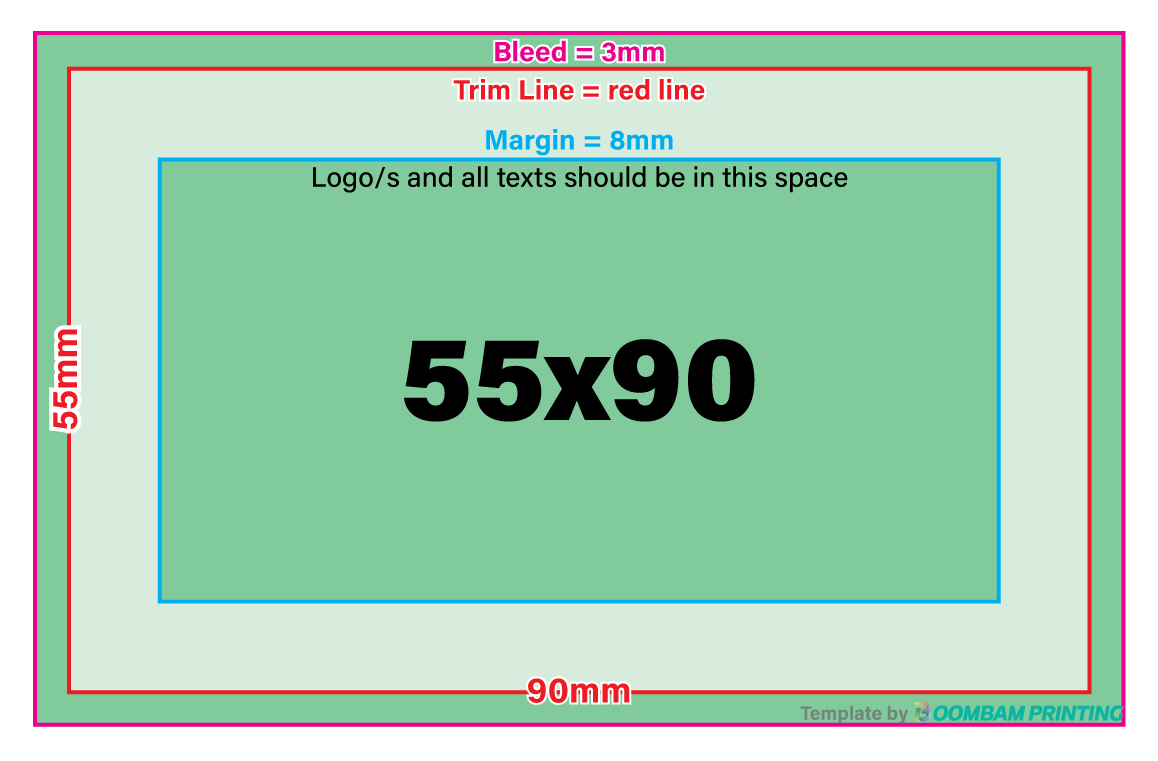
1.2. In the “Bleed and Slug” part, enter the size of the bleed (3mm)
1.3. Click “Create”
For finished designs:
2.1. Open the “Properties” tab, or click “Export”.
2.2. Save the file with your preferred file name, inside your preferred folder.
2.3. Under “Marks and Bleeds” Check the measurement in “Bleeds”. You can change the bleed measurement by unchecking the “Use Document Bleed Settings”. Make sure that the bleed is 3mm for all sides.
2.4. Click “Export”.
Adobe Illustrator
For new files:
1.1. Click “New File”, choose a document size, or type the size in Width and Height
1.2. In the “Bleed” part, enter the size of the bleed (3mm)
1.3. Click “Create”
For finished designs:
2.1. Go to File and click “Save As”
2.2. Click on the dropdown of “Save as type”, select "Adobe PDF".
2.3. Under "Marks and Bleeds", Check the measurement in “Bleeds”. You can change the bleed measurement by unchecking the “Use Document Bleed Settings”. Make sure that the bleed is 3mm for all sides.
2.4. Click “Save PDF”.
Important Note:
For custom-shaped fridge magnets, make sure to add 3mm thick bleed by extending the artwork to 3mm thick. Make the trim line (the guideline for the edges of the stickers/labels) color magenta (in CMYK setting, M=100%). This is to ensure accuracy with the intended shape of the fridge magnets.
We Accept: .pdf | InDesign File (.indd) | Illustrator File (.ai, .eps) | Image Assets: 300 DPI
We Don't Accept: JPEG / JPG, Microsoft Word, Publisher file
Note: If your file is in Microsoft Word or Publisher, export the file to PDF. You can manually add bleed by adjusting the paper size, add 6mm to the length and another 6mm to the width, giving them 3mm bleed on all sides.
(ex: If your page size is an A4, which is 210mm x 297mm, then adjusted size will be 216mm x 303mm)
- In Microsoft Word, it's Layout > Size > More Paper Sizes.
- In Microsoft Publisher, it's Page Design > Size > Page Setup.
Then, adjust the margins accordingly. (ex: If the margin is 8mm, add 3mm for all sides)
|