Canva
1. Go to File > Settings and select "Show Print Bleed". A dashed line will appear around your design workspace.
2. Click "Share" > "Download". Select "PDF Print" as the file type to ensure 300dpi output.
3. Check "Include crop marks and bleed". If using Canva Pro, select "CMYK" as the color profile.
Adobe InDesign
1. For New files:
1.1. Click "New File", choose a document size, or type Width and Height.
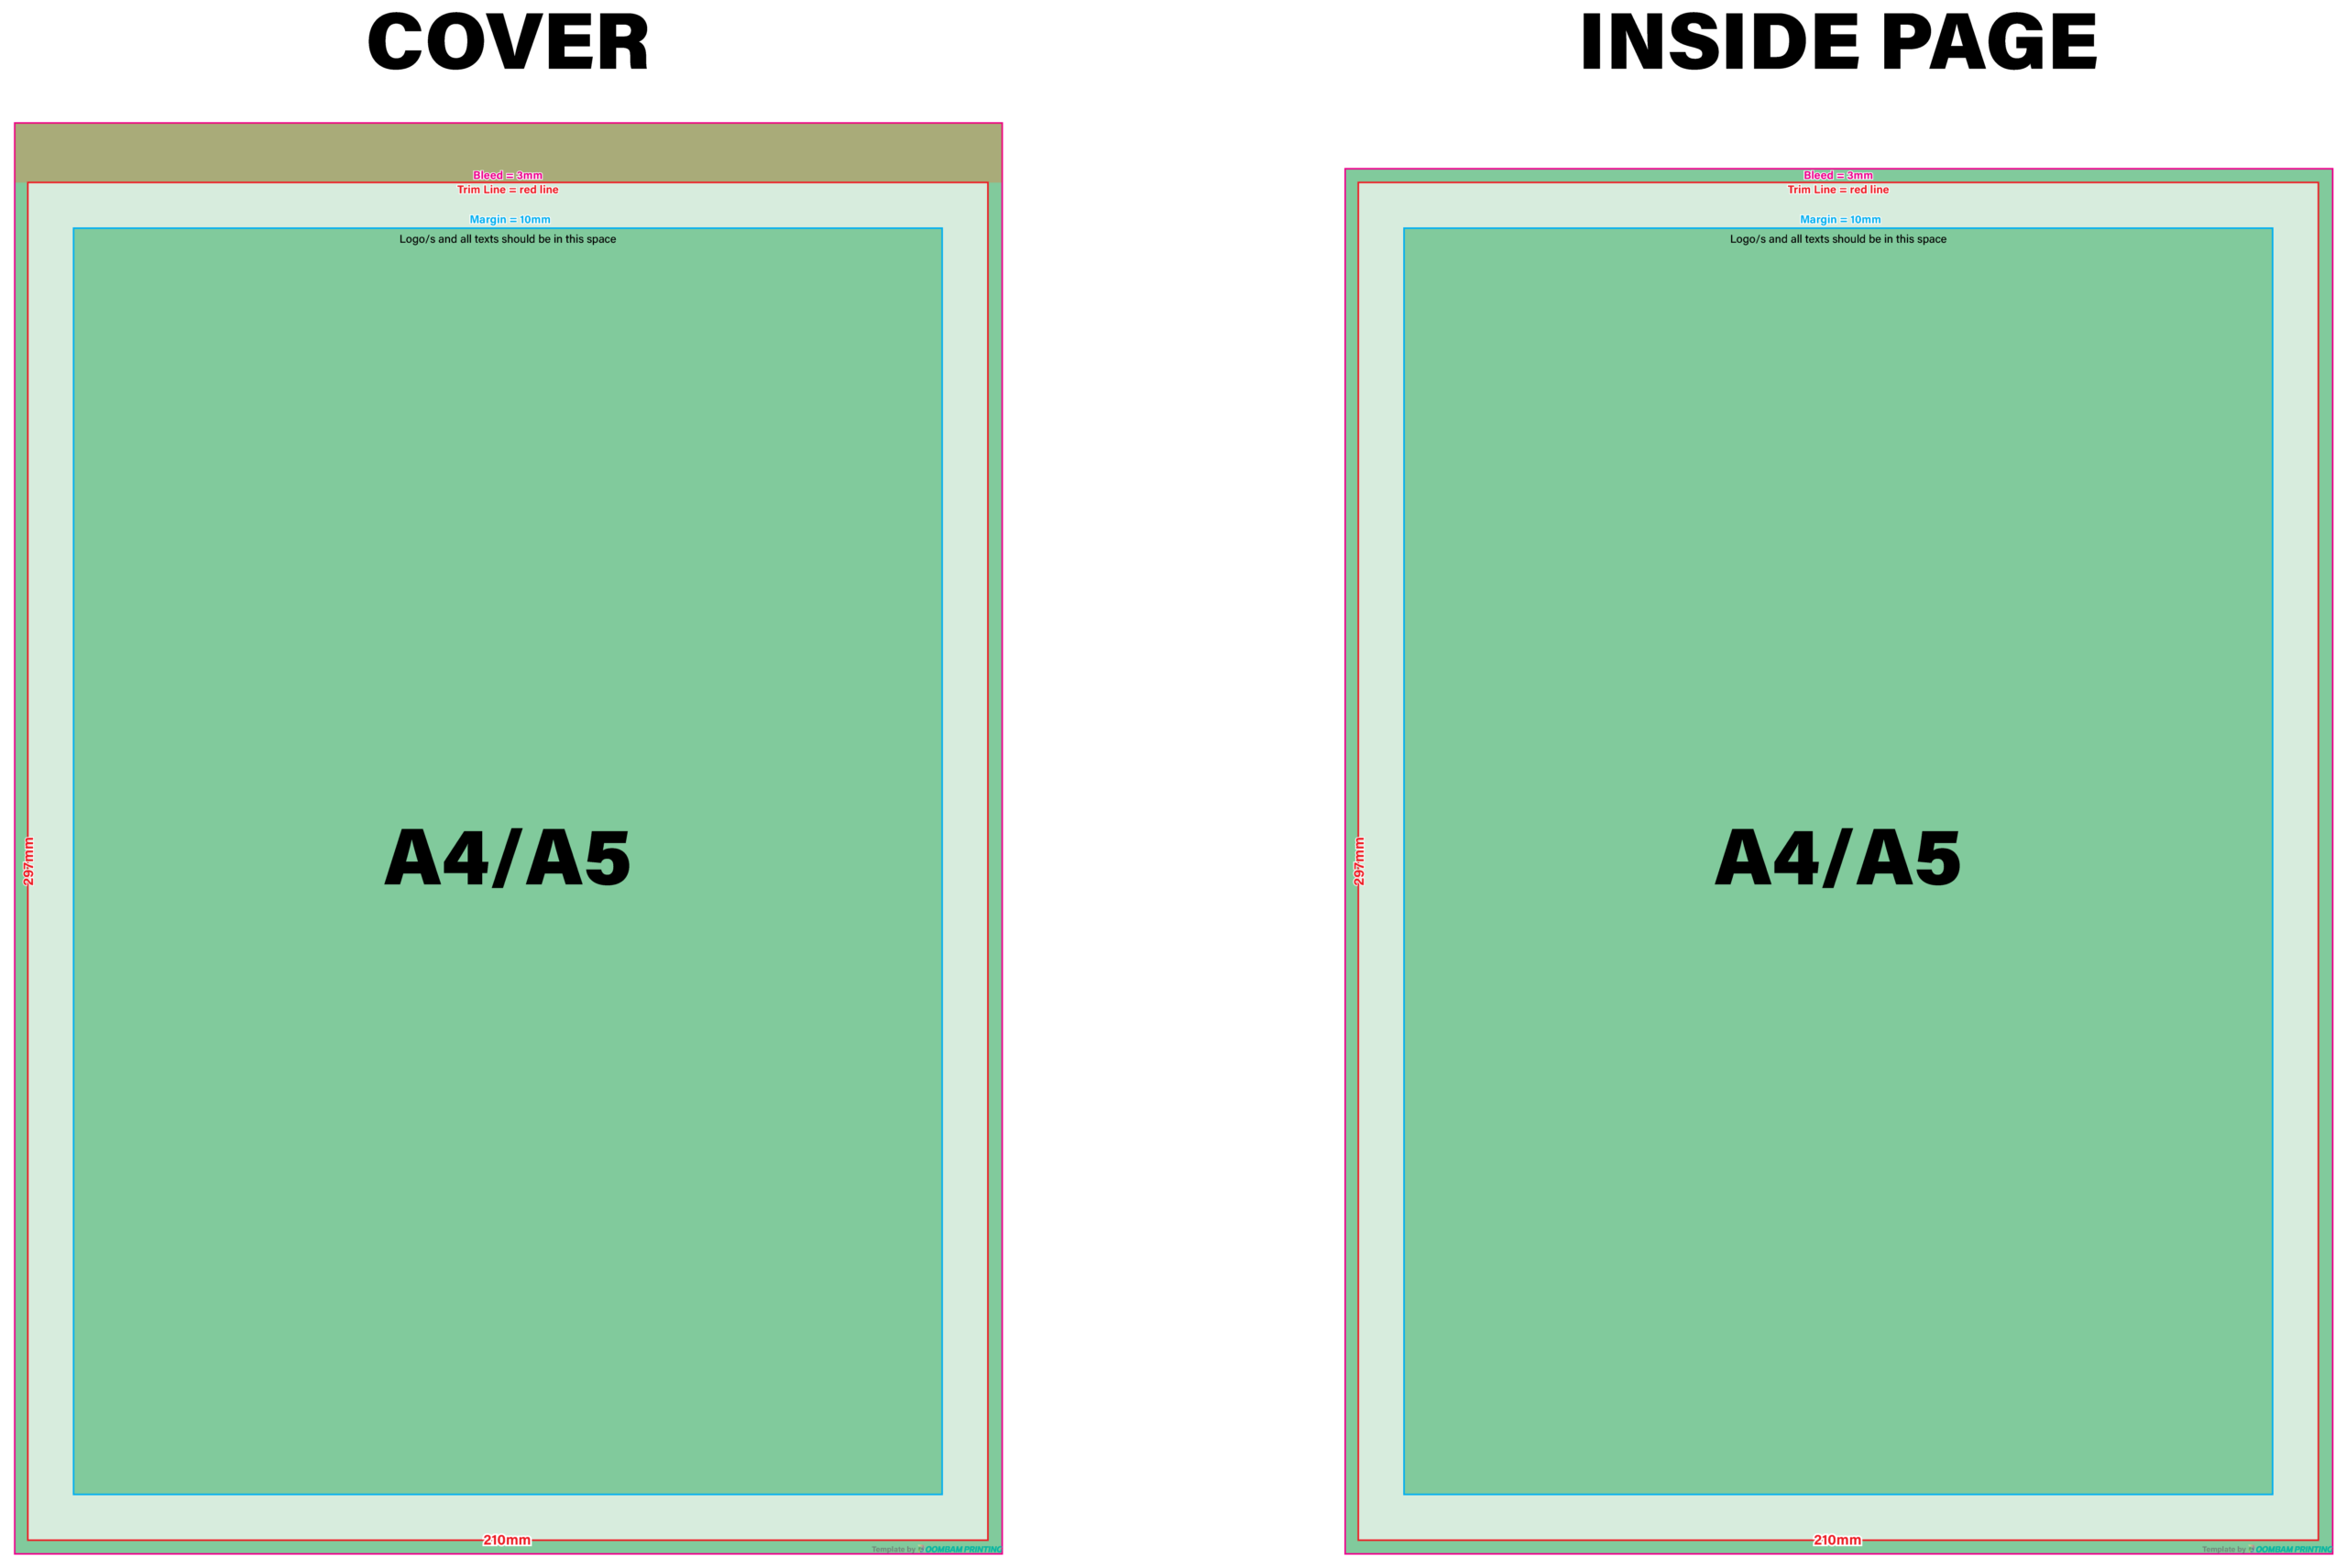
1.2. In "Bleed and Slug", enter the size of the bleed (3mm).
1.3. Click "Create".
2. For Finished designs:
2.1. Open "Properties" tab, or click "Export".
2.2. Save file with preferred name and folder.
2.3. Click "Marks and Bleeds". If bleed is zero, uncheck "Use Document Bleed Settings", and enter 3mm bleed on all sides.
2.4. Click "Export".
Adobe Illustrator
1. For New files:
1.1. Click "New File", choose a document size, or type Width and Height.
1.2. In the "Bleed" part, enter the size of the bleed (3mm).
1.3. Click "Create".
2. For Finished designs:
2.1. In "Bleed" section, enter 3mm for all four sides. Set Color Mode to CMYK and Raster Effects to High (300ppi).
2.2. Ensure all background colors extend to the red bleed guideline outside the Artboard.
2.3. Go to File > Save As > "Adobe PDF". Under "Marks and Bleeds", check "Use Document Bleed Settings" and "Trim Marks".
We Accept: .pdf | InDesign File (.indd) | Illustrator File (.ai, .eps) | Image Assets: 300 DPI
We Don't Accept: JPEG / JPG, Microsoft Word, Publisher file
Note: If your file is in Microsoft Word or Publisher, export the file to PDF. You can manually add bleed by adjusting the paper size, add 6mm to the length and another 6mm to the width, giving them 3mm bleed on all sides.
(ex: If your page size is an A4, which is 210mm x 297mm, then adjusted size will be 216mm x 303mm)